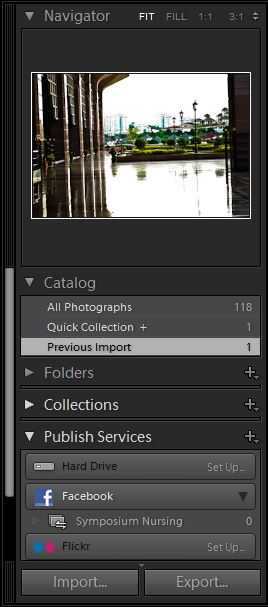
First of all, adobe lightroom must be install in computer. Open your lightroom, then click 'import' to import photo from folder..
 |
| Click 'import' |
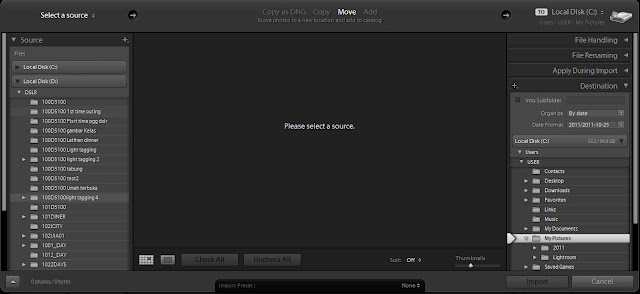
then select the folder you one.
 |
| Select the folder you want to use |
Select the picture that you want to edit
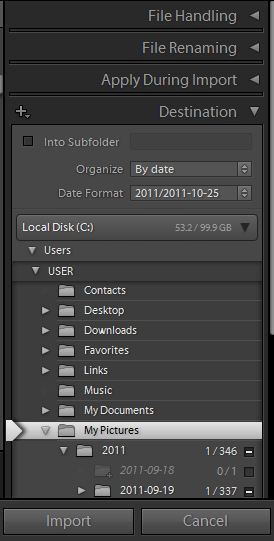
then click 'import' at the left side
 |
| click 'import' |
|
your picture will appear at screen, then double click to large the picture size..for example, I choose overexposure picture..
 |
| The photo with overexposure |
Click 'Auto Tone'
 |
| Photo become normal exposure, but still bright |
Adjust the tone at the 'Tone Control' such as decrease exposure, decrease brightness, increase contrast, increase vibrance.
 |
| Tone and color level column |
So, your photo become like this
 |
| after first tone level |
If you feel photo still bright or not contrast, so decrease brightness and increase contrast
 |
| this is the result |
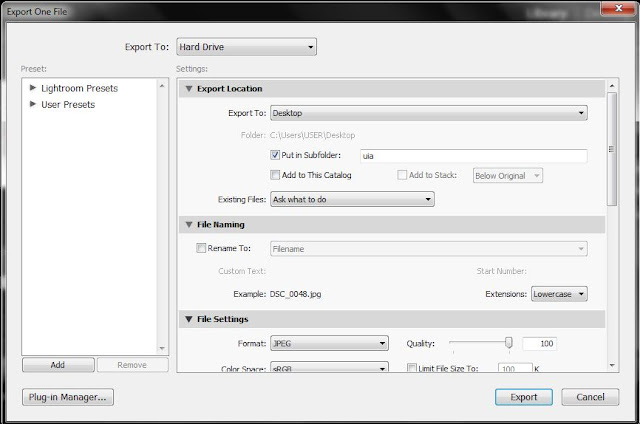
Then save your photo
 |
| click 'export' to save |
This will appear..
 |
| export to where you want, and put in subfolder |
So, this the result of your photo
 |
| this is the result |
So, what do you think? Easy right. So you can try it.


3 comments:
first time masuk blog ni, sb baru jumpa di KB tadi...
like your blog, most of the info I'm looking for is here. but I'm not a "lensa" person, just someone who like beautiful pics. and like to (try) use available tools in the net/ comp.
jemput singgah blog saya www.kisah-dan-kasih.blogspot.com. just a simple blog short stories.
thank you for coming here..you can try explore all software...it good for knowledge..
TQ...SYUKRAN,,,, for knowledge..
Post a Comment